raindrops on roses and whiskers on kittens/
bright copper kettles and warm woolen mittens/
brown paper packages tied up with strings/
these are a few of my favorite things…♥♥♥
My short list: <— so hard for me to stop at just 3 y’know. I like all the things.
- Petrichor. The earthy smell of rain soaking into dry soil.
- Avocado toast. My fav recipe at the end of this post. 🙂
- Fresh, new things, like…my new website!!!!
TA-DA!!!!!! How gorgeous is my new website?!! So professional! So fresh! So clean! *so fresh and so clean, agrees outkast* I love it to bits! I can’t believe I officially have my own webbie!!! Can you feel my excitement exploding through the screen? Can you feel it???
Warning: gushing ensues.
This sumptuous site is so perfect and beautiful because it was created by my older sister. Dear peeps, I present to you Michelle Soon, graphic designer extraordinaire — incredibly talented in her field and beyond, and totally smokin’ hot (although that’s neither here nor there, I just like saying that).
You can check out her portfolio here, and have your mind blown by her alluring and sophisticated design work.
Item #2: avocado on toast.

This. Stuff. Is. The. Shiznit. Like I can’t even. I could eat this all day, every day, for reals, playa! Just talking about avo toast makes me happy (and gangsta wannabe). I mean, avo and toast go together literally like bread and butter — what is an avocado, really, but vegetable butter? Except you can eat loads of it and still feel healthy and smug cos it’s good for you, as this boring and informative article affirms.
Last week, vancitybuzz told me via facebook that avocado toast is available in varying incarnations at several well-loved establishments around our beautiful city… but why pay a premium for something so wonderful that you can make at home every day? At every meal? And all the times in between?
So my friends, this very special favourite thing of mine deserves very special care. Yes. Yes, it does. So I went all out on this one, starting with making my very own Hokkaido milk bread (think brioche, Asian style) for the toast.
It’s a heckuva lot of effort, but bread is worth it. I’ll say it again.
Bread is worth it.
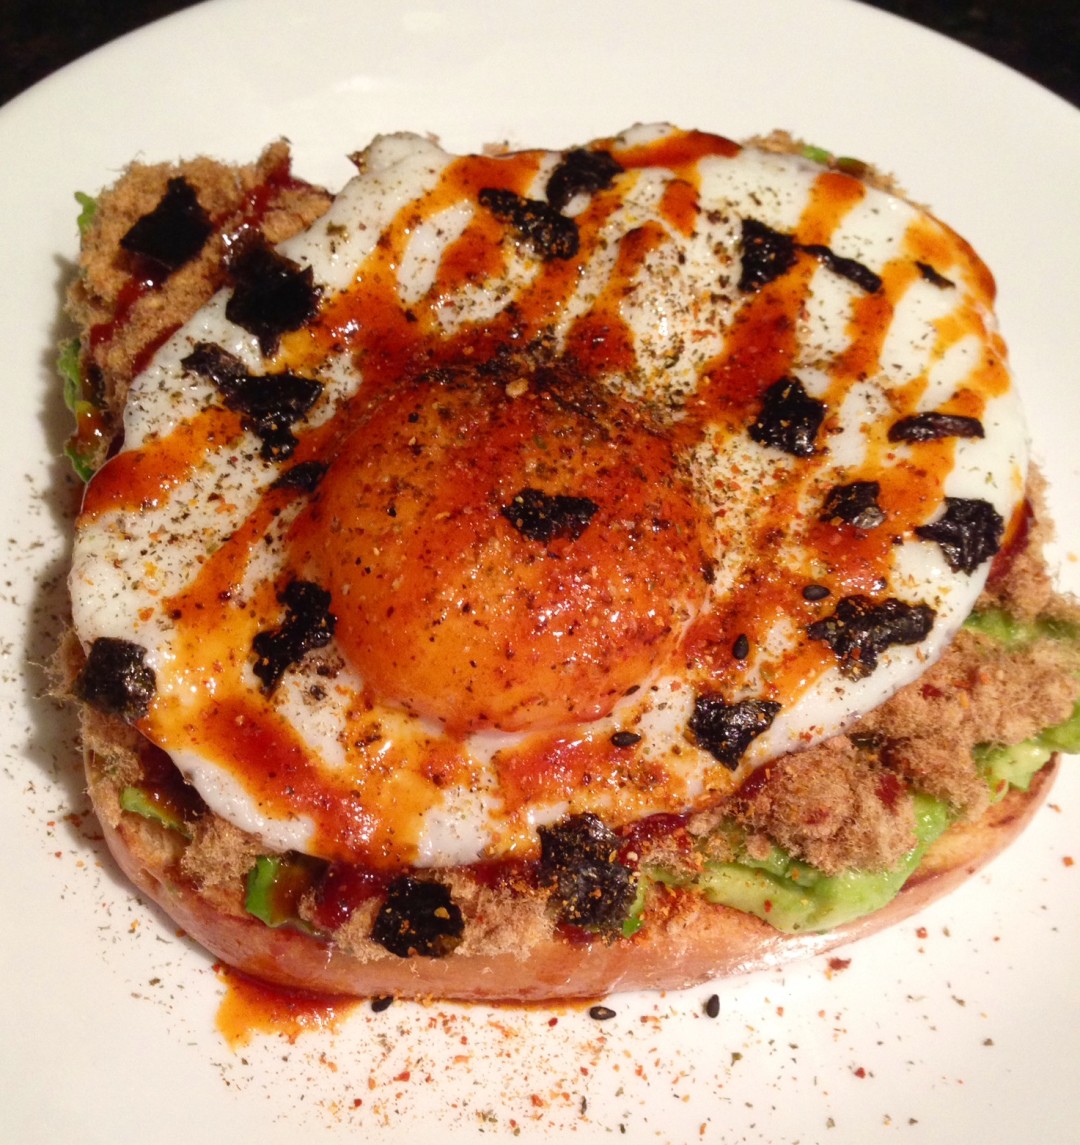
Slightly sweet, thick cut toast. A ripe avocado. Some crispy pork floss. A fried egg. Definitely a fried egg. And homemade gochujang sauce to drizzle over all that magic.
Oh em gee. Please make this today. Honestly, if you don’t have time for the bread just grab your favourite loaf from your local grocer, no judgement here. I do it all the time. But please, eat this.
happilee,
mlee
my fav avocado on toast
a mariemakes original 🙂

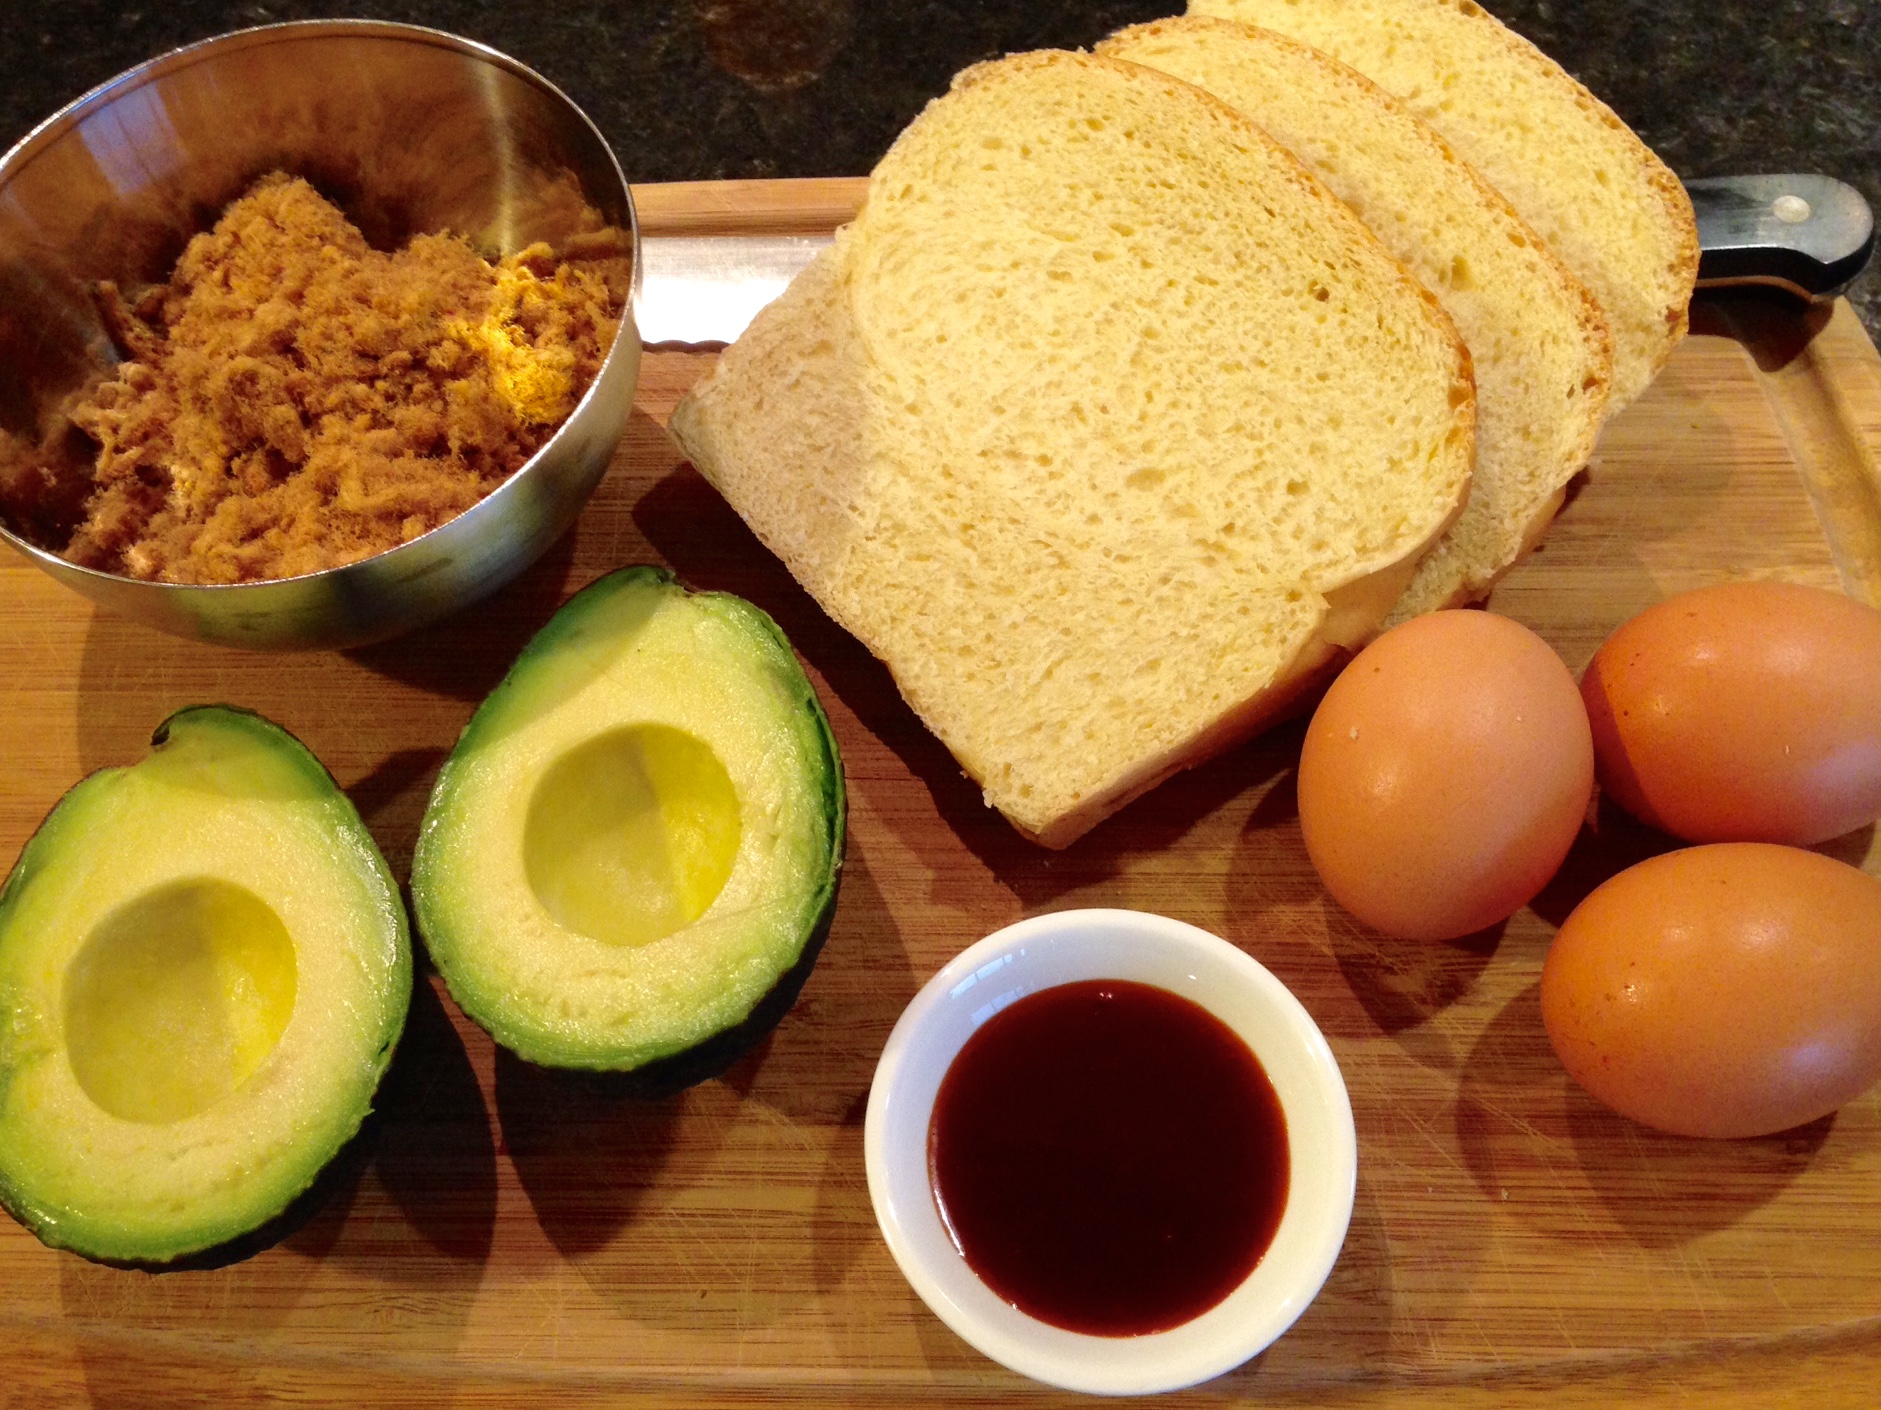
Ingredients
- 1 thick cut slice hokkaido milk bread (or a slice of your favourite bread)
- 1/2 ripe avocado
- 1/4 cup crispy pork floss (available at T&T Supermarkets)
- 1 egg
- drizzle gochujang sauce
- shichimi togarashi and norigoma furikake, to taste (japanese spice and seaweed condiments, also available at T&T Supermarkets)
Instructions
- toast bread in toaster*. set aside.
- in a small, non-stick pan, fry the egg sunny side up, till whites are set but yolk is still runny. season with a tiny bit of salt and pepper.
- sorry, i might get OCD technical here. smoosh ripe avocado. don’t cut, don’t purée, smoosh. you want chunky and smooth bits. place avocado in bowl, use spoon to cut, stir and smoosh to desired consistency.
- spread smooshed avocado on toasted bread. top with crispy pork floss and gently lay fried egg on the floss. drizzle with gochujang sauce and sprinkle norigoma furikake and shichimi togarashi to taste.
- devour. make another.
Notes
*for extra fatty deliciousness, butter bread and fry till golden brown.
hokkaido milk bread (asian sweet bread)

Ingredients
starter dough:
- 1/3 cup all purpose flour
- 1 cup of water
bread:
- 5 cups all purpose flour
- 1/3 cup plus 4 teaspoons sugar
- 1 teaspoon salt
- 2 large eggs
- 1 cup of milk
- 4 teaspoons instant yeast (about two packages of yeast)
- 6 tablespoon butter, at room temperature, divided
- 1 serving of starter dough
Instructions
to make the starter dough:
- mix 1/3 cup of flour and water together. whisk until the flour is completely dissolved there are no lumps.
- pour the mixture into a small saucepan and turn the heat to medium. stir the mixture constantly. cook the starter dough until the mixture thickens. you should be able to draw “lines” in the mixture and the indent should remain for a few seconds. the mixture should be perfect at 149 degrees Fahrenheit (65 degrees Celsius).
- once the mixture is the right consistency, remove from heat and set aside.
to make the bread:
- combine the flour, salt, sugar and instant yeast in a bowl. make a well in the centre of the dry ingredients. add in all wet ingredients (milk, eggs and the starter dough).
- use the dough hook attachment on your stand mixer. begin mixing on medium speed until the dough comes together. add in the butter and continue mixing/kneading.
- keep kneading until it is a smooth dough. it shouldn’t be too sticky and have some elasticity, about 30 minutes. knead the dough for a bit by hand, or go manual all the way, as i did. it took about 35-40 mins to get a smooth, elastic consistency. it is tiring, but think of it as a pre-carb consumption workout. or get your child to help out. 🙂 add more flour to keep the dough from being too sticky, scattering the flour over the dough as you knead. i used about a cupful of extra flour.
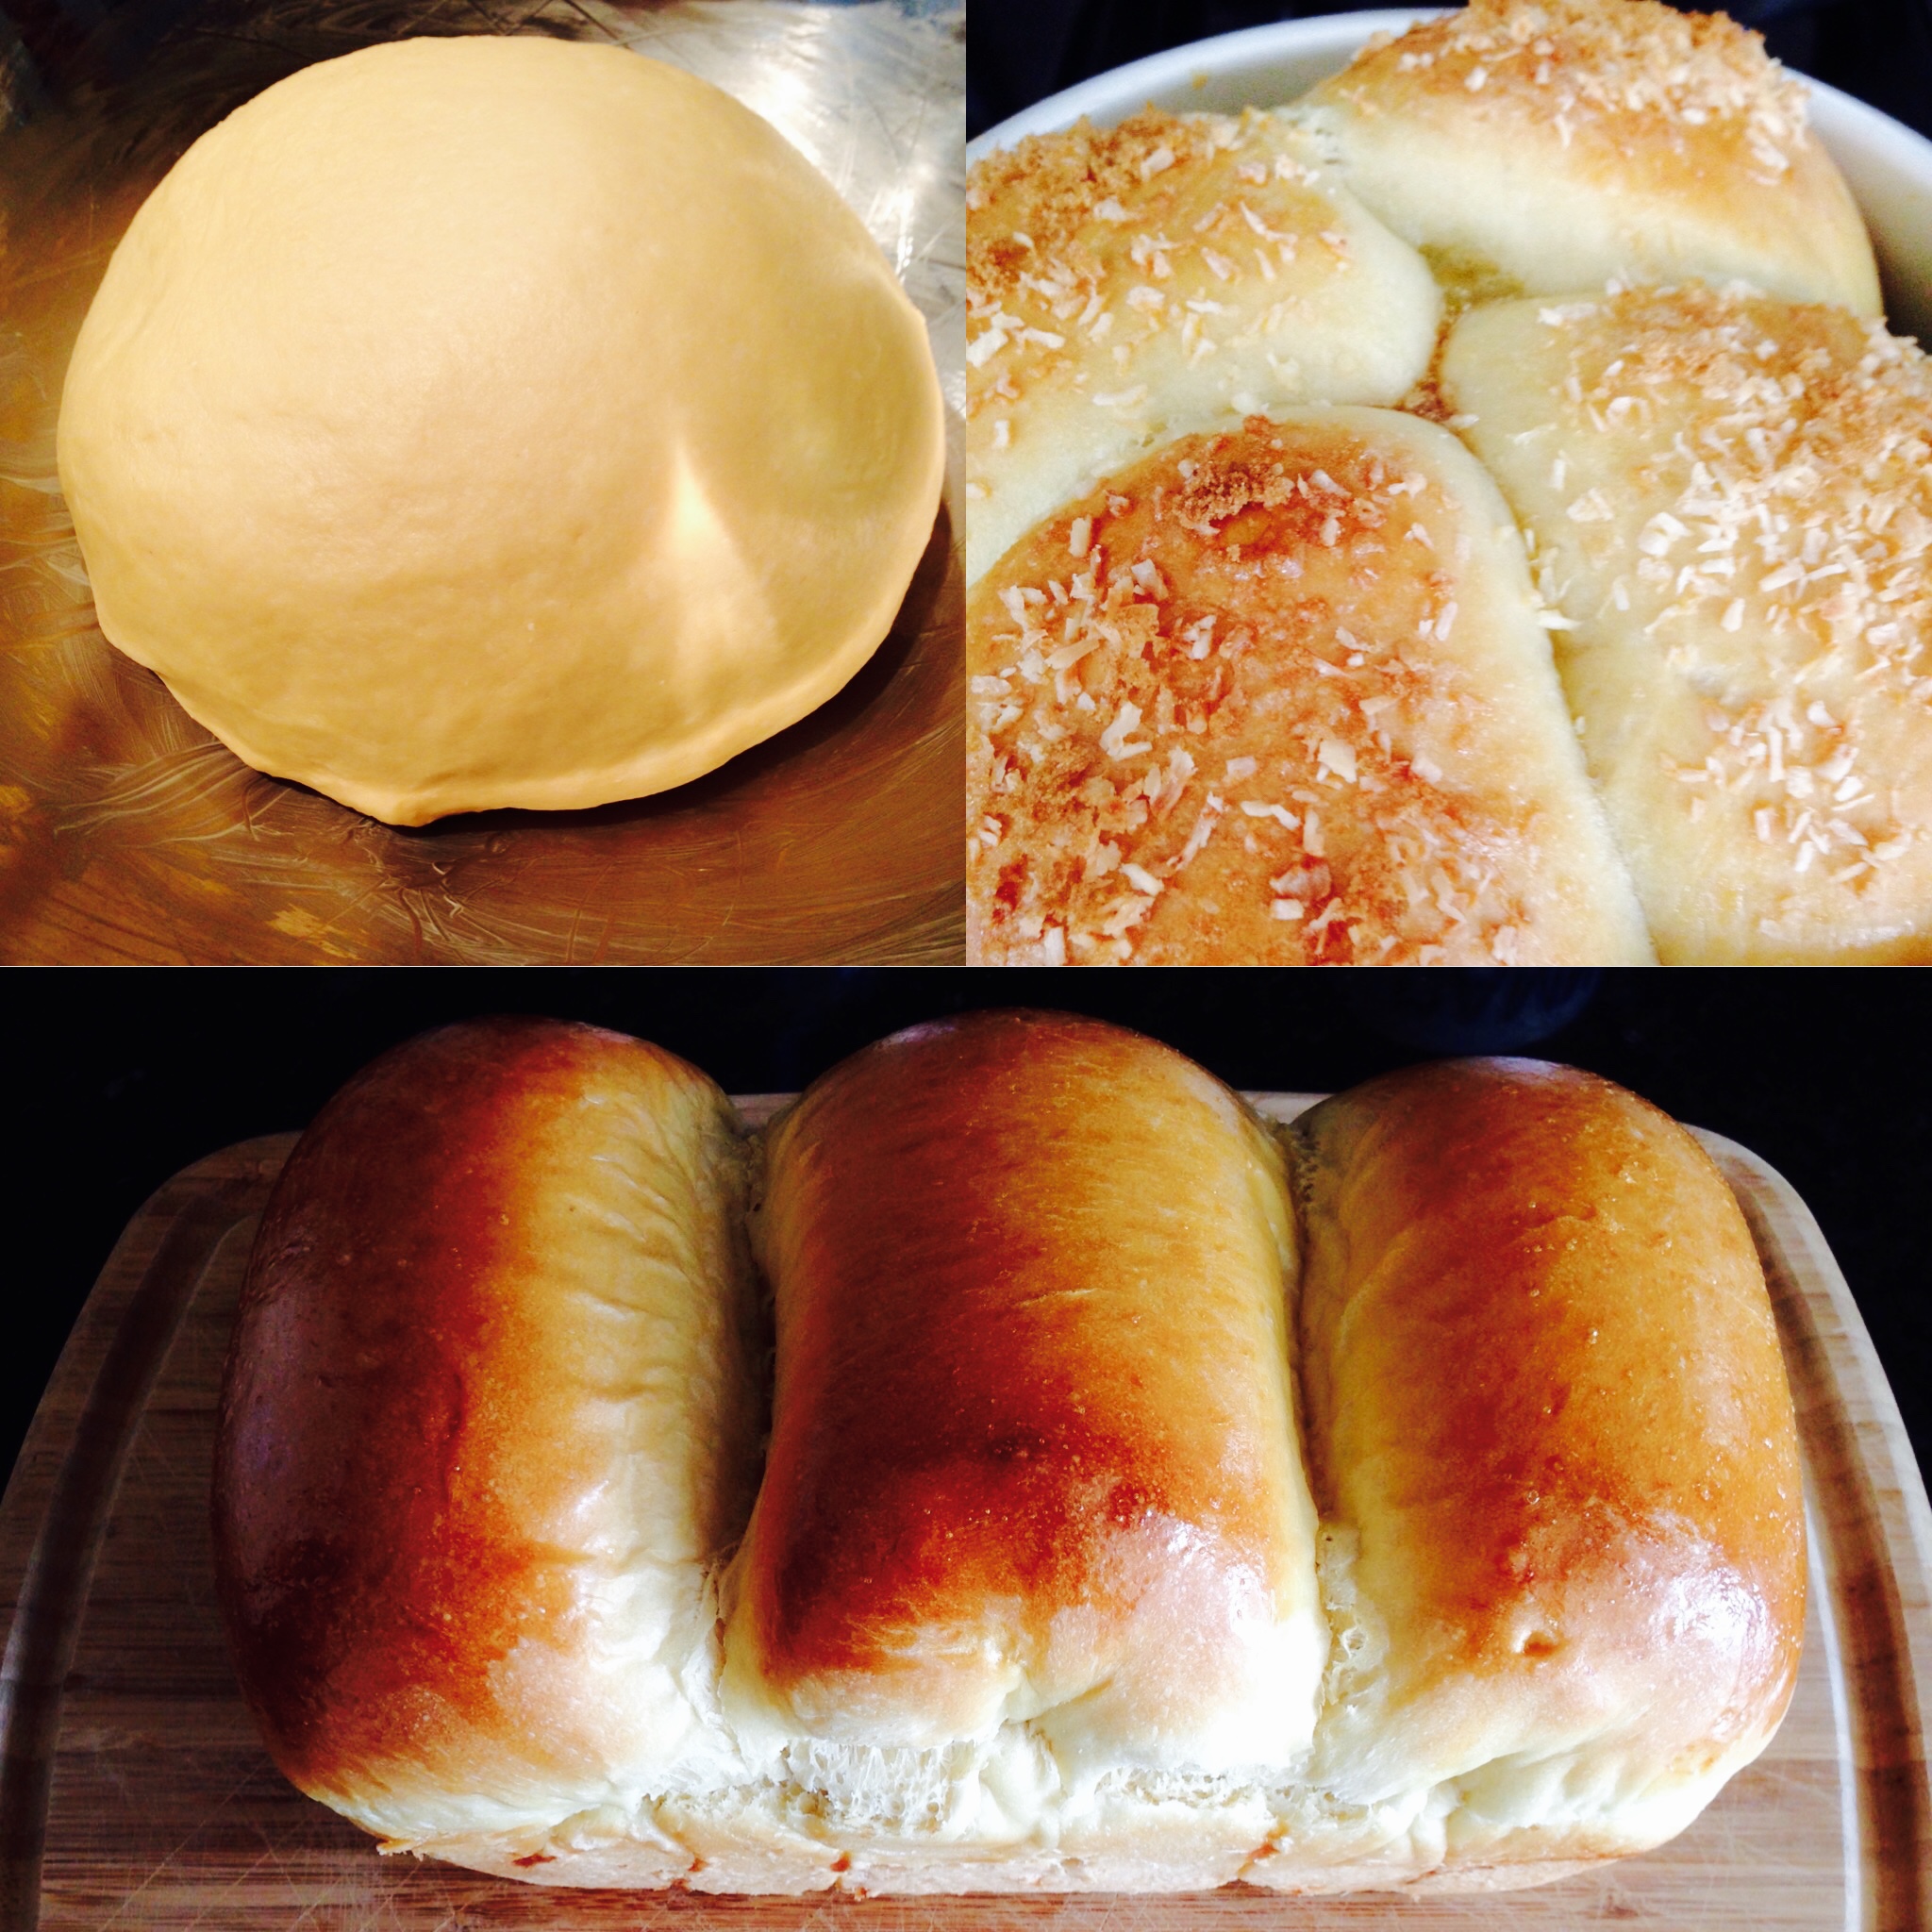
- knead the dough into a ball. grease a large bowl with some butter. place dough into the greased bowl and cover with a wet towel. let it proof until it has doubled in size, about 50 minutes.
- after proofing, move the dough to a clean surface and split the dough into four equal portions. knead and form dough into balls. place back into bowl and cover with the wet towel and let it rest for 15 minutes.
- shape the dough and add layers of fluffy goodness by rolling each portion of the dough into an oval. take one end of the oval and fold it to the middle of the dough. then fold the other end on top of the first fold. next, flip dough over with the folds facing down. flatten the dough with rolling pin and flip it over again. roll into a log and place into a buttered loaf pan*. do the same with the rest of the dough.
- place the wet towel over the rolls and let them rise until they have doubled in size, about 50 minutes.
- beat an egg well. brush the egg mixture on top of the bread to create a beautiful, brown, shiny finish.
- finally, bake the bread at 325 degrees Fahrenheit for approximately 30 minutes.
*i managed to fit three rolls in my pan, and shaped the last ball into four mini kaya (singaporean coconut jam) buns. just slather some kaya or your favourite filling onto the dough before rolling it up into a bun or a log, and sprinkle some unsweetened coconut and golden yellow sugar on top. have fun with it! it’s a wonderfully versatile recipe.
Notes
adapted from instructables.com
gochujang sauce
a korean sauce for everyday use

Ingredients
- 6 tablespoons korean hot pepper paste (available at T&T Supermarkets)
- 3 tablespoons brown sugar
- 2 tablespoons sesame oil
- 2 tablespoons sushi rice vinegar
- 1 tablespoon soy sauce
- 1 tablespoon honey
Instructions
- blend all ingredients in a liquid measuring cup with a spout. pour into a squeeze bottle for easy dispensing, and store in refrigerator. keeps well, but honestly, you’ll use it so much it won’t last long. 🙂
Notes
slather it on everything. wash your face with it. cuddle it at night. ALWAYS keep a bottle of it in your fridge.
Comments